Exploring HTML Imports
Web Components have come a long way in the past few months and one of the technologies that I’m most interested in is HTML Imports (or “imports”, for short). Imports allow you to load additional documents into your page without having to write a bunch of ajax. This is great for Custom Elements where you might want to import a suite of new tags. I spent the day playing with imports and thought it would be useful to write up my progress.
The Lowdown
Imports are a new type of link tag which should be familiar to you since that’s also how we load our stylesheets.
<link rel="stylesheet" href="/path/to/styles.css" />For an import we just replace the rel with one of type import.
<link rel="import" href="/path/to/some/import.html" />Support
Native imports are currently only available in Chrome. Be sure to check the support brackets on caniuse to see if things have changed since the writing of this article. If you’d like to play with imports today you can leverage the webcomponents.js polyfill.
A Basic Example
OK so what’s a very basic import look like?
<!DOCTYPE html>
<html lang="en">
  <head>
    <meta charset="utf-8" />
    <title>Basic HTML Imports</title>
    <!-- Pull in our blog post example -->
    <link rel="import" href="/imports/blog-post.html" />
  </head>
  <body>
    <p>Hello World!</p>
  </body>
</html>
In its simplest form an import works just like calling a stylesheet. We have to make sure there’s a document to import so let’s create a fake blog post in imports/blog-post.html.
<div id="blog-post">
  <h1>Awesome header</h1>
  <p>Here is some really interesting paragraph content.</p>
</div>
To test, you’ll need to host your index.html and imports/ folder on a local server. I recommend serve if you don’t already have one installed.
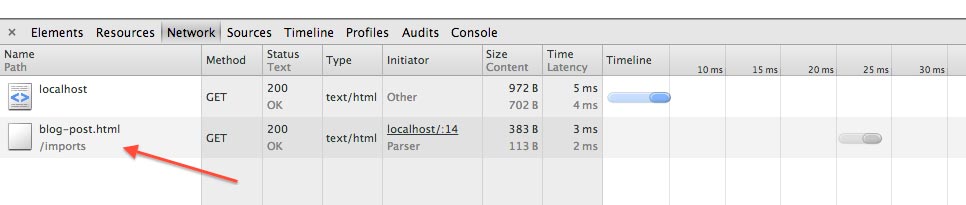
Once you have that setup, visit your index page. If you take a look at the console you can see the request returning.
Well that’s cool, but now what?
Let’s grab the content of the import using some JavaScript and append it to the body. We’ll do this back in our index.html.
<body>
  <p>Hello World!</p>

  <script>
    var link = document.querySelector('link[rel=import]');
    var content = link.import.querySelector('#blog-post');
    document.body.appendChild(document.importNode(content, true));
  </script>
</body>
First we query the link tag which loaded our import. Then we extract our #blog-post element and store it in a variable called content. In browsers with native support for imports (i.e. Chrome and Opera) notice that we don’t have to write any event handler code to wait till the import has loaded, we can just assume the content is there and start working with it. Finally we add the new content to our body.
If you’re following along you should end up with something like this:
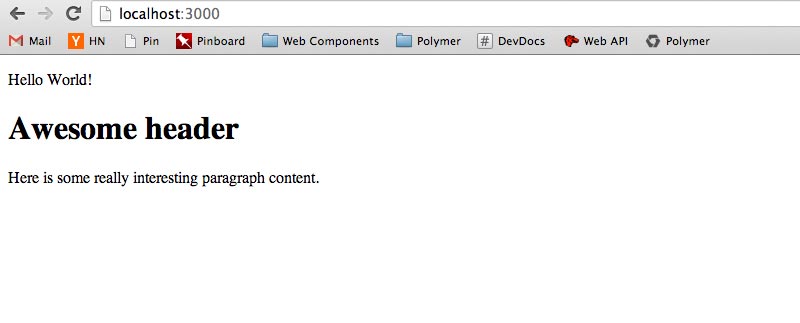
Exciting, I know ;) But it demonstrates a no frills approach to loading content that doesn’t require ajax and writing our own event handlers. Let’s keep digging to see what else we find…
A Basic Example with Polymer
Polymer is a library that sugars the Web Components APIs and seeks to enable the use of Web Components in all modern browsers. The hope is that devolopers will use Polymer to inform the W3C on which direction to take with Web Components; so rather than wait for a stinky spec, we can guide the implementation process.
Polymer attempts to keep parity with the the evolving specifications but obviously there are some places where the API must differ because of the limitations of current browsers. In the case of HTML Imports, Polymer waits for the DOMContentLoaded event before triggering the actual import process. This means we need to listen for the HTMLImportsLoaded event on either window or document to know when it is finished. Let’s add that to our index.html.
<!DOCTYPE html>
<html lang="en">
  <head>
    <meta charset="utf-8" />
    <title>Basic HTML Imports</title>
    <link rel="import" href="/imports/blog-post.html" />
  </head>
  <body>
    <p>Hello World!</p>

    <!-- Include platform.js -->
    <script src="/bower_components/webcomponentsjs/webcomponents.js"></script>

    <!-- Listen for the HTMLImportsLoaded event -->
    <script>
      window.addEventListener('HTMLImportsLoaded', function() {
        var link = document.querySelector('link[rel=import]');
        var content = link.import.querySelector('#blog-post');
        document.body.appendChild(document.importNode(content, true));
      });
    </script>
  </body>
</html>
Using the above we should get the same results as before.
You might notice that I used webcomponents.js instead of only including the HTML Imports polyfill. The Web Components polyfills are structured so you can take any of the polyfills à la carte but I find it’s easier to just include all of webcomponents.js when I’m experimenting, rather than worry if I have each individual polyfill loaded. That’s just personal preference (in other words: I’m lazy).
Using Scripts in our Imports
Let’s look at using <script> tags inside of our import. We’ll start by removing the <script> block from our index.html.
<!DOCTYPE html>
<html lang="en">
  <head>
    <meta charset="utf-8" />
    <title>Basic HTML Imports</title>
    <link rel="import" href="/imports/blog-post.html" />
  </head>
  <body>
    <h1>Boring header</h1>
    <p>Hello World!</p>
  </body>
</html>
Then we’ll transfer that script block over to our blog post in imports/blog-post.html.
<div id="blog-post">
<style>
h1 {
background: lightgreen;
color: green;
}
p {
font-size: 16px;
font-family: Helvetica, Arial, sans-serif;
color: green;
font-weight: bold;
}
</style>
<h1>Awesome header</h1>
<p>
Here is some really interesting paragraph content. It comes with its own stylesheet!
</p>
</div>
<script>
// thisDoc refers to the "importee", which is blog-post.html
var thisDoc = document.currentScript.ownerDocument;
// thatDoc refers to the "importer", which is index.html
var thatDoc = document;
// grab the contents of the #blog-post from this document
// and append it to the importing document.
var content = thisDoc.querySelector('#blog-post');
thatDoc.body.appendChild(thatDoc.importNode(content, true));
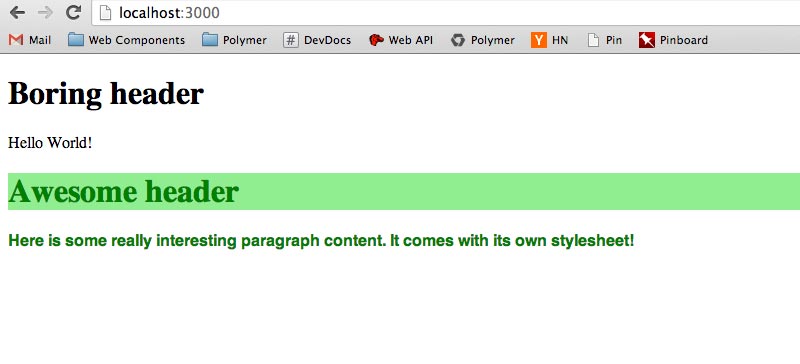
</script>If we run this we should get the following output (note: I’ve included a style element as well).
An important thing to take notice of is the relationship between thisDoc and thatDoc. thisDoc refers to the blog-post.html document, while thatDoc refers to our index.html file. It’s useful to distinguish between the two so we can querySelector for #blog-post and not worry that we may have grabbed something out of the importing document. Thanks to Dominic Cooney for the heads up on this.
You’ll also notice that since the import has access to our document object it is able to add itself to the page. In practice you probably wouldn’t want imports adding themselves wherever, but the important takeaway is that anything imported can access the main document. This means an import could register itself as a Custom Element using our document object and we wouldn’t need to write any additional code. We’re almost to that point so let’s keep going…
Using Templates in our Imports
I’m getting a little tired of our fake “blog post” so let’s switch over to something more practical. We’ll use Chart.js to create a very simple pie diagram and we’ll use the new <template> tag to hold the contents of our import. If you haven’t heard of the template tag before check out this introduction.
I’ve updated the index.html so it imports a new chart.html file.
<!DOCTYPE html>
<html lang="en">
  <head>
    <meta charset="utf-8" />
    <title>Imports with Templates</title>
    <!-- Make sure to import chart.html -->
    <link rel="import" href="/imports/chart.html" />
  </head>
  <body>
    <h1>Quarterly Pokemon Sales</h1>
  </body>
</html>
Here’s what imports/chart.html looks like:
<!-- Include Chart.js so our import can use it -->
<script src="/lib/Chart.min.js"></script>
<template id="chart-pie">
  <canvas id="myChart" width="200" height="200"></canvas>
  <script>
    var data = [
      {
        value: 30,
        color: '#F38630'
      },
      {
        value: 50,
        color: '#E0E4CC'
      },
      {
        value: 100,
        color: '#69D2E7'
      }
    ];

    // Get the context of the canvas element we want to select
    // It's ok to use document here because this script block won't
    // activate till it's added to the page.
    var ctx = document.getElementById('myChart').getContext('2d');
    var myNewChart = new Chart(ctx).Pie(data);
  </script>
</template>

<script>
  // thisDoc refers to the "importee", which is chart.html
  var thisDoc = document.currentScript.ownerDocument;

  // thatDoc refers to the "importer", which is index.html
  var thatDoc = document;

  // grab the contents of #chart-pie from this document
  // and append it to the importing document.
  var template = thisDoc.querySelector('#chart-pie');
  thatDoc.body.appendChild(thatDoc.importNode(content, true));
</script>
We’re creating a new <template> which contains a canvas tag and a script block to create our pie chart. The advantage of using a template tag is that any script blocks inside of it will not execute until we clone the contents and add them to the DOM.
Running the above gives us this:
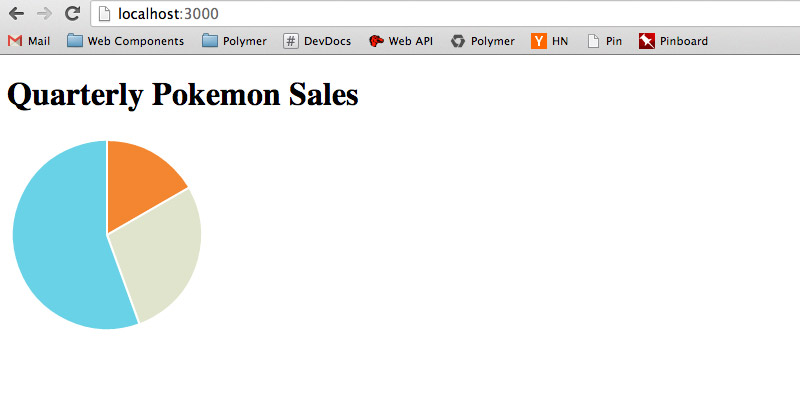
Well this is interesting. We’re importing an entire pie chart and our index page isn’t cluttered with a bunch of code. Unfortunately we don’t have much control over where the pie chart ends up. It would be nice if we could turn the contents of the import into a tag and place that wherever we please. Thankfully Custom Elements let us do just that!
Using Custom Elements in our Imports
I’ll say in advance that you might need to read through this section a few times before you fully grok it. We’re going to touch on a lot of new stuff so consider this the bonus round :)
The final markup for our index.html file is going to look like this:
<!DOCTYPE html>
<html lang="en">
  <head>
    <meta charset="utf-8" />
    <title>Imports with Custom Elements</title>
    <link rel="import" href="/imports/chart.html" />
  </head>
  <body>
    <h1>Quarterly Pokemon Sales</h1>
    <chart-pie></chart-pie>
    <chart-pie></chart-pie>
    <chart-pie></chart-pie>
  </body>
</html>
We’re going to use our new Custom Element, chart-pie, which will allow us to produce pie charts wherever we want. The result will look like this:
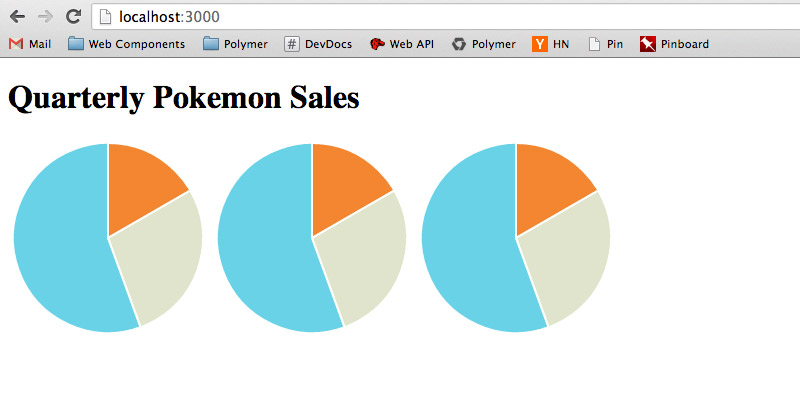
Obviously not the most amazing thing ever, but from a practical perspective being able to drop a pie chart on your page with one line of HTML is pretty sweet.
To create the chart-pie tag we’ll need to create a Custom Element. Custom Elements are new tags with a lifecycle of JavaScript callbacks. Typically they use Shadow DOM to hide their internal markup and expose attributes and specific styles to the client. For a full primer on Custom Elements, check out this article by Eric Bidelman on HTML5Rocks.
Here’s what our updated imports/chart.html looks like.
<script src="/lib/Chart.min.js"></script>
<template id="chart-pie">
  <canvas class="myChart" width="200" height="200"></canvas>
</template>

<script>
  // thisDoc refers to the "importee", which is chart.html
  var thisDoc = document.currentScript.ownerDocument;

  // thatDoc refers to the "importer", which is index.html
  var thatDoc = document;

  var template = thisDoc.querySelector('#chart-pie');

  // Make sure you extend an existing HTMLElement prototype
  var ChartPieProto = Object.create(HTMLElement.prototype);

  // Setup optional lifecycle callbacks
  ChartPieProto.createdCallback = function() {
    // Create a shadow root to hold our template content
    var root = this.createShadowRoot();
    var clone = thatDoc.importNode(template.content, true);

    // Create the pie chart with Chart.js
    var data = [
      {
        value: 30,
        color: '#F38630'
      },
      {
        value: 50,
        color: '#E0E4CC'
      },
      {
        value: 100,
        color: '#69D2E7'
      }
    ];

    //Get the context of the canvas element we want to select
    var ctx = clone.querySelector('.myChart').getContext('2d');
    var myNewChart = new Chart(ctx).Pie(data);

    // Add the template content + chart to our Shadow DOM
    root.appendChild(clone);
  };

  var ChartPie = thatDoc.registerElement('chart-pie', {prototype: ChartPieProto});
  //var chartPie = new ChartPie();
  //var chartPie = document.createElement('chart-pie');
</script>
Let’s walk through it piece by piece.
<template id="chart-pie">
  <canvas class="myChart" width="200" height="200"></canvas>
</template>
On lines 1-3 we’ve shortened the template down so that it only contains our canvas tag. We’ll use the Custom Element createdCallback to actually instantiate the chart in here.
// thisDoc refers to the "importee", which is chart.html
var thisDoc = document.currentScript.ownerDocument;

// thatDoc refers to the "importer", which is index.html
var thatDoc = document;

var template = thisDoc.querySelector('#chart-pie');
Lines 6-12 should look familar from the last example. We’re storing our two documents in variables and querying for the template tag.
var ChartPieProto = Object.create(HTMLElement.prototype);On line 15 we define the prototype for our Custom Element called ChartPieProto. This prototype extends the HTMLElement prototype which is a requirement for creating a new element.
ChartPieProto.createdCallback = function() {
  ...
};
On line 20 we see the first lifecycle callback, createdCallback. The createdCallback is run every time the parser hits a new instance of our tag. Therefore we can use it as a kind of constructor to kickoff the creation of our chart. We’ll want to create a new chart instance for each tag so all of our Chart.js code has been moved inside of this callback.
var root = this.createShadowRoot();
var clone = thatDoc.importNode(template.content, true);
On lines 22-23 we create a Shadow DOM to hold the markup for our chart.
var data = [
  {
    value: 30,
    color: '#F38630'
  },
  {
    value: 50,
    color: '#E0E4CC'
  },
  {
    value: 100,
    color: '#69D2E7'
  }
];

//Get the context of the canvas element we want to select
var ctx = clone.querySelector('.myChart').getContext('2d');
var myNewChart = new Chart(ctx).Pie(data);
Lines 26-43 should look familiar. It’s the same Chart.js code from before except now we use querySelector to find the contents of the template clone and we’re using a class for myChart instead of an id.
root.appendChild(clone);On line 46 we add the new content to our Shadow DOM.
var ChartPie = thatDoc.registerElement('chart-pie', {prototype: ChartPieProto});Line 49 is where we actually register our Custom Element and assign it to the name chart-pie. From here you can either place a <chart-pie></chart-pie> tag somewhere on your page, or use JavaScript to instantiate an instance and add it to the document. This is demonstrated in the comments on lines 50-51. If you refer back to our index.html example we just use the <chart-pie> tag.
<!DOCTYPE html>
<html lang="en">
  <head>
    <meta charset="utf-8" />
    <title>Imports with Custom Elements</title>
    <link rel="import" href="/imports/chart.html" />
  </head>
  <body>
    <h1>Quarterly Pokemon Sales</h1>
    <chart-pie></chart-pie>
    <chart-pie></chart-pie>
    <chart-pie></chart-pie>
  </body>
</html>
Which produces this:
Conclusion
If you’ve made it this far congrats and thanks for hanging in there! I know that last section was a little crazy but stop for a moment and think about what we just did.
By using an HTML Import we were able to pull in a document which added a new tag to our application. Imagine if all of Chart.js was written in this manner. There would be no need for us to write any glue code to generate a chart ever again. That would allow us to focus only on the code that matters to our application, and leave all that other boilerplate tucked away inside of Custom Elements.
Over the next few months I’ll be blogging exclusively about this topic because I think it’s really interesting so check back later for more!
Till then make sure to hit me up on Twitter if you have any questions or leave a note in the comments. Thanks!