Creating a Markdown Tag with Polymer
Ah Markdown… Such an amazing tool. I honestly would not be writing this blog post if Markdown did not exist. I tried many times to get in to blogging but I always found the writing experience, whether it be in a GUI or WordPress’ HTML mode, too limiting. Markdown changed all of that for me and I think it’s high time we make it a full fledged member of our developer toolbox.
So today I’m going to show you how to build a Markdown tag using Polymer, a Web Components framework from Google.
Github
If you’d like to follow along you can grab the code from Github.
The Setup
First things first, we need to download the latest version of Polymer. I like to do this with bower and I would encourage you to do so as well. Although it hasn’t been discussed much, I think bower is going to be as important to web components as npm and the node_modules folder is to Node.js. When developers can assume the location and version of a dependency then they’re able to remove extra work from the consumer’s plate. But that’s a discussion for another day! For now let’s just run
bower initto create our bower.json file.
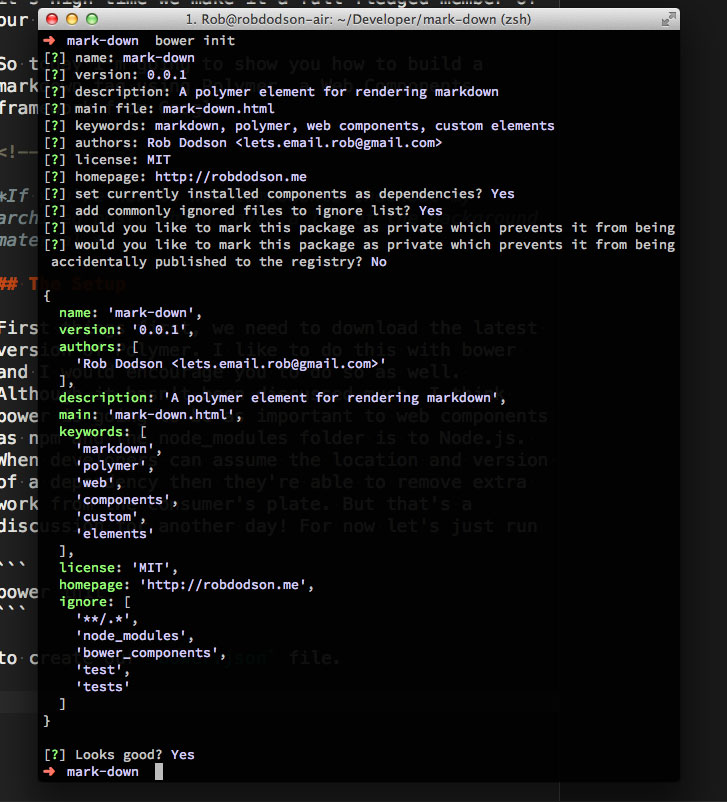
And we’ll want to install our Polymer and Markdown dependencies so
bower install Polymer/polymer marked --saveLastly we’ll setup a test page for our element. I’m going to assume that the element lives in a folder called (creatively) elements so we’ll import from there.
<!DOCTYPE html>
<html lang="en">
  <head>
    <meta charset="utf-8" />
    <title>Markdown Polymer Element</title>
    <!-- Include webcomponents.js to polyfill web components in old browsers -->
    <script src="bower_components/webcomponentsjs/webcomponents.js"></script>

    <!-- Import our polymer element -->
    <link rel="import" href="elements/mark-down.html" />
  </head>
  <body>
    <!-- Test our awesome new tag -->
    <mark-down></mark-down>
  </body>
</html>The Element
We’ll start with a very basic skeleton in our elements/mark-down.html file.
<link rel="import" href="../polymer/polymer.html" />
<polymer-element name="mark-down">
  <template>
    <div id="markdown"></div>
  </template>
  <script>
    Polymer({});
  </script>
</polymer-element>
Let’s walk through this a bit.
<polymer-element name="mark-down"></polymer-element>This line tells Polymer that we’d like to define a new element and its tag name should be mark-down.
<template>
  <div id="markdown"></div>
</template>
This is our template which Polymer will convert to Shadow DOM. All of the Markdown that we write inside of the <mark-down> tag will be parsed and end up here.
<script>
  Polymer({});
</script>
Finally, we call the Polymer constructor and pass in a prototype object. This makes our new tag available so we can start using it in the document. But first we’ll need to parse our Markdown into HTML!
Markdown
We’ll use Polymer’s ready callback to grab the textContent of our tag and convert it all to Markdown. To define behaviors for our element we’ll modify our prototype object (the object passed to the Polymer constructor).
Polymer({
  ready: function() {
    var content = this.trim(this.textContent);
    var parsed = markdown.toHTML(content);
    this.$.markdown.innerHTML = parsed;
  },
  // Remove excess white space
  trim: function() { ... }
});
The first thing we do is to grab everything inside of the <mark-down> tag and remove any extra white space. Here I’m using a trim method that I borrowed from Ryan Seddon’s Markdown element. Big thanks to Ryan :D
ready: function() {
  var content = this.trim(this.textContent);
  ...
},
Next we convert the content into Markdown using the toHTML method of our Markdown library. Then we take this new, more presentational markup, and add it to the #markdown div inside of our template.
ready: function() {
  ...
  var parsed = markdown.toHTML(content);
  this.$.markdown.innerHTML = parsed;
}Node Finding
You might notice the funny use of $ and think I’m doing something clever with jQuery. What’s actually happening is that Polymer creates a map of any element inside of our template with an id. It then stores this map in a $ property. So if you’re using ids you can quickly access elements with the use of this.$.someId. In the Polymer docs this is referred to as automatic node finding.
But aren’t ids an anti-pattern?
Although the traditional document model only allows for one id per page, the Shadow DOM creates a kind of clean slate where each element has its own id sandbox. This means we can use an id of #markdown in our element and not worry if the parent document also contains an element with id #markdown. Pretty nifty!
Test
The only thing left is for us to throw some Markdown into our tag to test it out.
<mark-down>
  # This is a heading ## This is a subheading Here is **more** _Markdown!_ `This is some codez` This
  [is a link](http://robdodson.me)
</mark-down>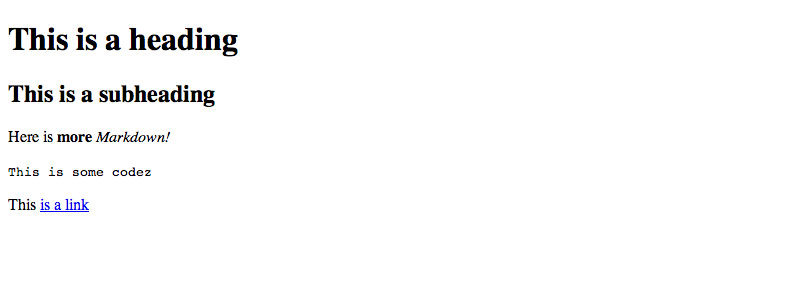
Piece O’ Cake!
Moar!
There’s a lot more that we could do, for instance, using something like contenteditable to allow us to toggle back and forth between the source and the rendered content. I’ve posted the code on Github so fork it and go crazy.
Be sure to leave a comment if you want to share your experiments!
Till next time!